 By
Priya Aslam
By
Priya Aslam Jul 03, 2021
 6 Great Shopify Alternatives in 2022
 28/04/2022
If you decide to become a seller on Fiverr and sell your expertise, as a beginner your biggest concern will be how to make the perfect Fiverr account.
Online earning platforms are getting populated by freelancers and tech-savvies. The reason is there are real ways to make money online – lots of people are doing it on everyday basis. From fresh and young entrepreneurs to freelance digital nomads to savvy marketers, there is an extensive range of adequate business ideas and ventures which you can both build and work on at home on your own laptop and a stable internet.
There are plenty of ecommerce and digital platforms for freelancers but among all of them Fiverr is always at the top of the list. Once you come up with the idea of becoming a seller on Fiverr, your initial concern is of how to sign up, how to create gigs on Fiverr or the step that you’ve got to take further after signing up. As a newbie you will feel baffled initially hence this blog has been written to give you a step-by-step guide on how to make the perfect Fiverr account.
Create Your Account On Fiverr
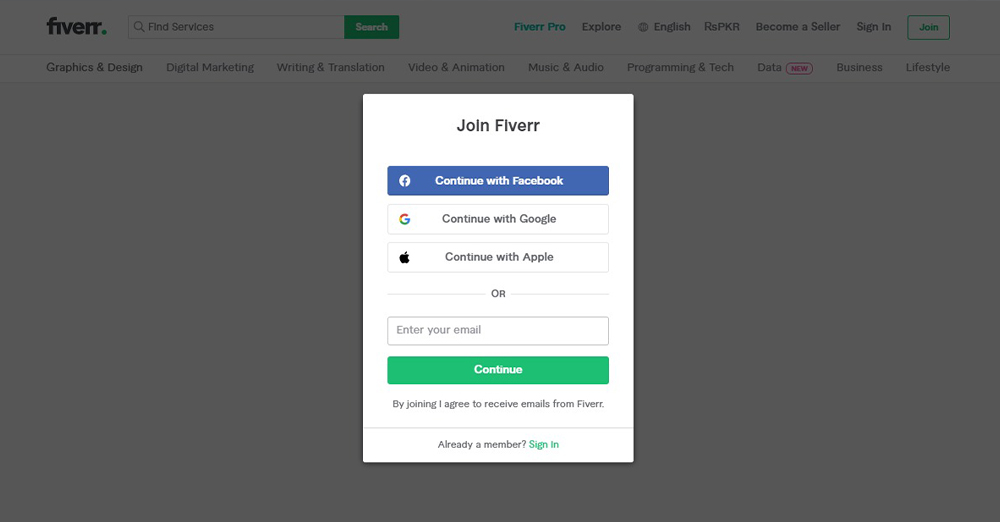
Signing up on Fiverr is quite easy. You can sign up through Google Account, Facebook Account, apple ID or simply by an email address. Next you choose the username and password. But you also have an option to use your email address instead of your username. After creating the account go to the inbox and activate it.
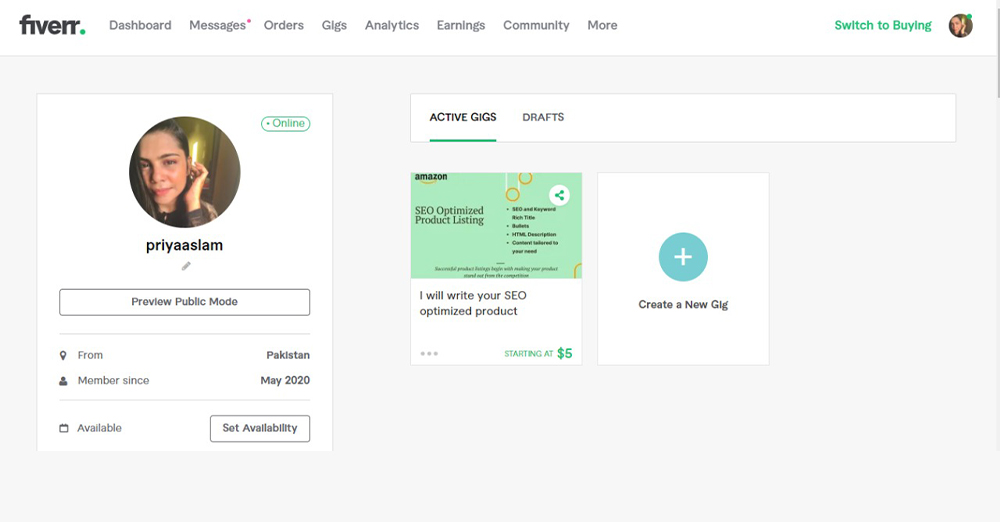
Set Up Your Profile
The next step is to set up your profile once the account is created and activated. The profile plays a very crucial role as it directly has an impact on the client. It leads them to know more about you and your services along with the gigs that are made as a reflection to your expertise.
Your profile must be professional in every aspect, form picture to description everything needs to be top notch. Add the right information and the right set of skills that you have to offer. Mention the language or languages that you are proficient in, it attracts the right client.
Make sure your skills match your gigs. Mention your education background and then focus mainly on the certificates. Your certificates help you stand out in the pool of your competitors. Once you’re done setting up your account you can create gigs on Fiverr.
Let’s jump on how to create impressive gigs on Fiverr.
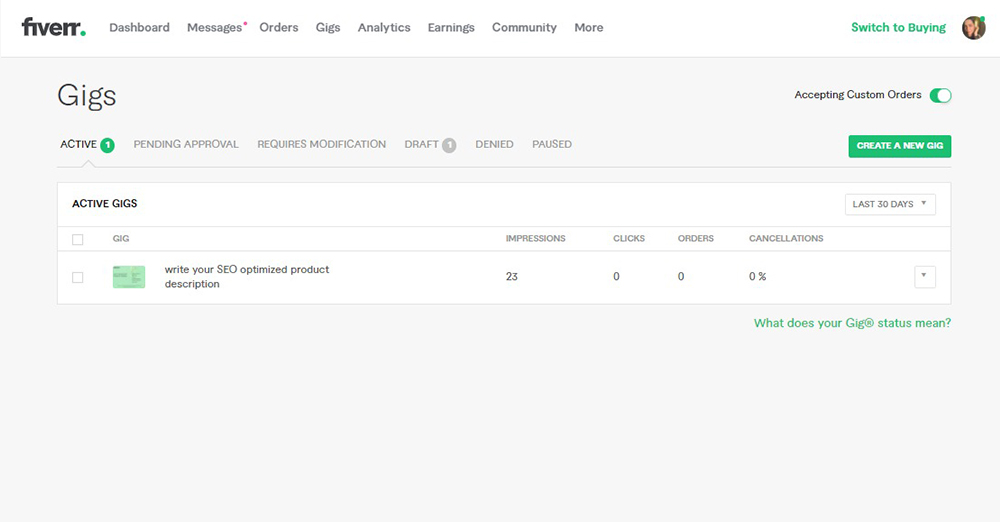
Create Gigs On Fiverr
You’re away from creating your first gig at Fiverr. Move your cursor to the selling option placed on the top of the bar and then click on “Gigs” option in the drop-down menu. Click “Create the new Gig” button and now you can start working on it.
1. Write An Overview Of Gigs
Once you’ve got into the section of “Gig Overview” you’ve got to fill the title of your gig, select the right category (you have an option for category and subcategory) then mention related search tags in the last box.
The title should be original, concise and to the point. Do not forget to focus on selecting the category and sub-category. It is the most important part of creating gigs on Fiverr because it’ll predict your options in the next steps.
Selecting the category is not a hard task because Fiverr will automatically suggest the categories in which it falls based on the title that you’ve written above. You can simply select the category from the drop-down menu as well.
If you want to make your gig valuable, select the best search tags. If you want any help, search for the tags used by other sellers of your niche. It summarizes your expertise which helps to get the right client.
“Save and continue” to go on the next section.

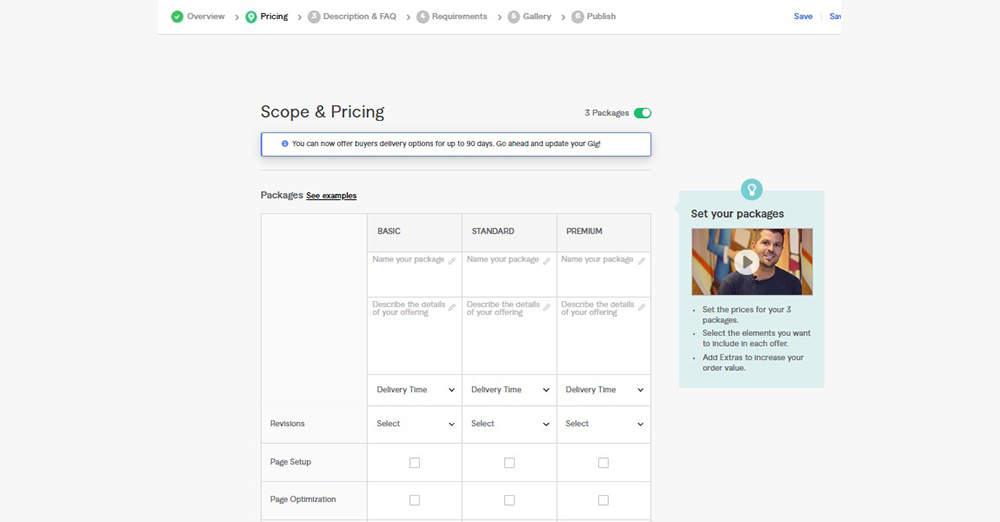
2. The Price Of Your Gigs
In this section you have the choice to set your own bid. Here Fiverr offers three different kinds of packages i.e. Basic, Standard and Premium. You can either go for all three options or one for all.
After that you need to give your package a title and description and make sure you’re creative because that it where the buyer will pay attention the most. Mention the delivery time which will show the working days and also you can differ it with your pricing.
If you want, you can also fill the shipping section according to the location.
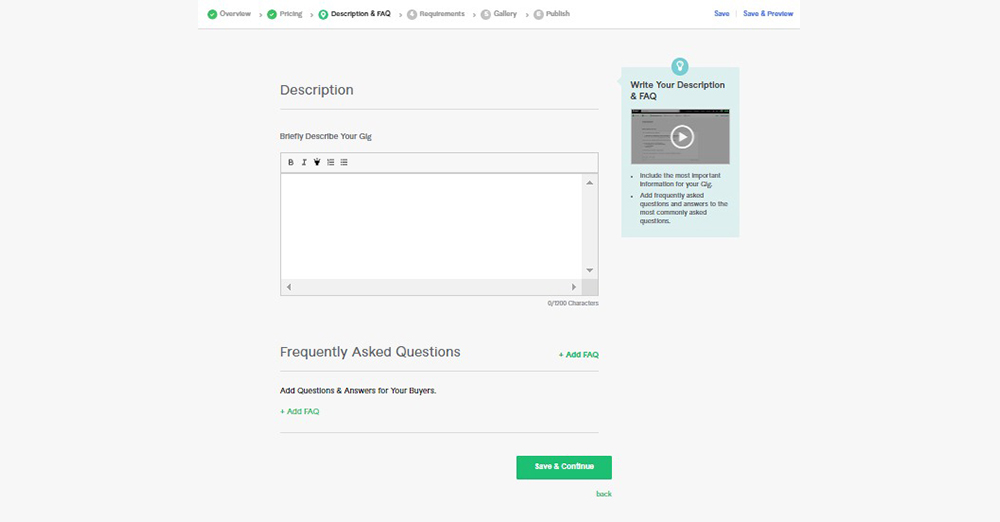
3. Mention Frequently Asked Questions (FAQ’s)
This option will lead you to a section of Frequently Asked Questions that may be revised with each project.
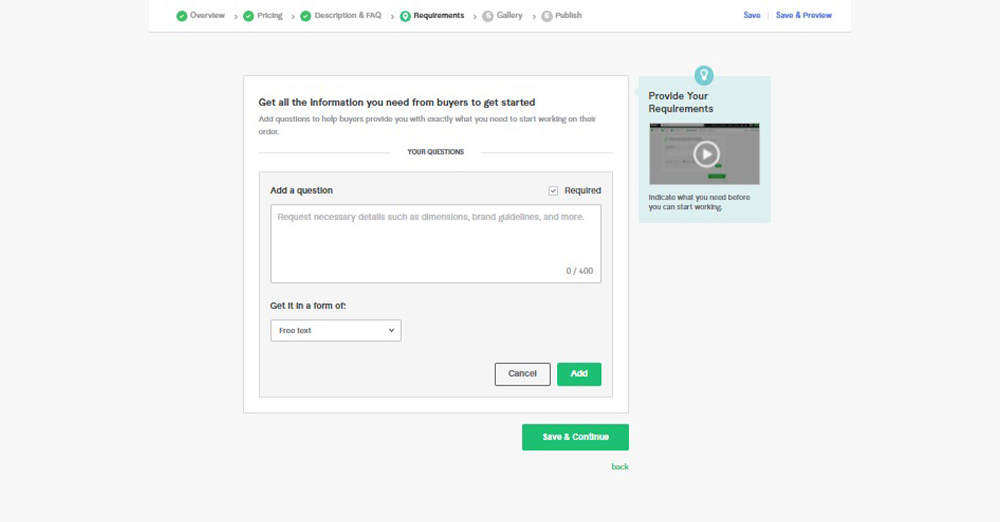
4. Your Requirements
Mentions all the requirements that you demand from the buyer’s community.
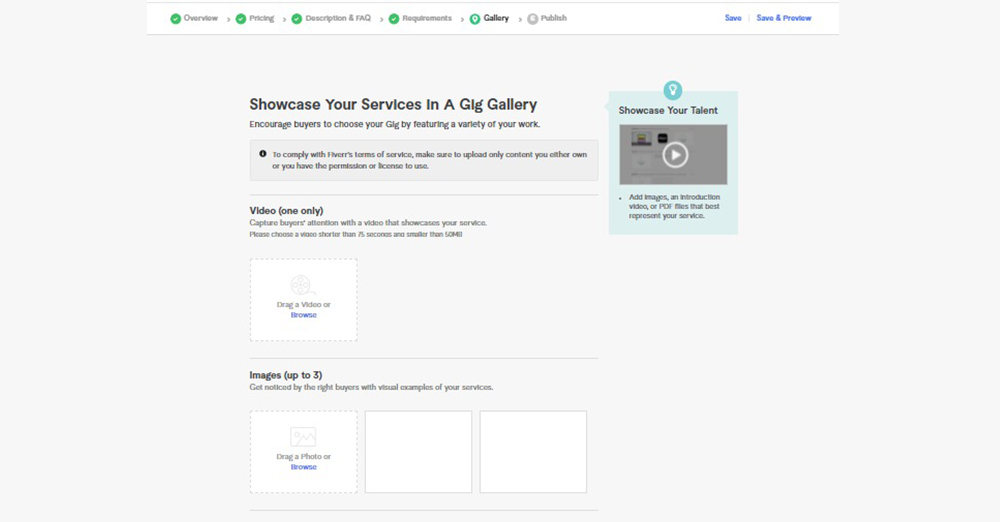
5. Make impactful Gigs Gallery Content
You gig’s gallery will make a great impact on the clients. You can add photos, videos or pdfs in the content of gigs.
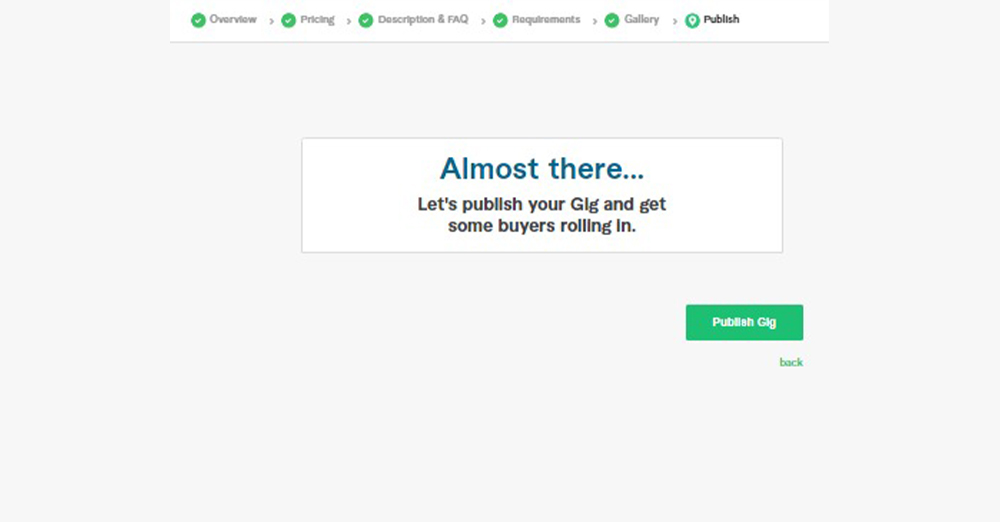
6. Publish Gigs And Go Live!
Now you can publish it! Click on “Publish Gig” option and the gig will go live.
Follow all these steps to create the best gigs and start your online journey of ecommerce and freelancing on Fiverr. Happy selling!
For more info, join our group; Sunnyali.com/group
28/04/2022

25/04/2022
22/04/2022